The Lift
The lift we chose for this Bronco is our 3 ½ inch kit that includes upper control arms, upper strut spacers, pre-load spacers, differential drops, and all the hardware needed. In the back, we added spacers to the factory struts to bring the rear up and added a track bar relocation bracket to make sure the rear axle was centered. This lift is a three to five-hour install with minor cutting and strut compressor required. It gives you increased ground clearance allowing you to comfortably run a 35-inch-tall tire, which we put on it, along with a Fuel wheel.


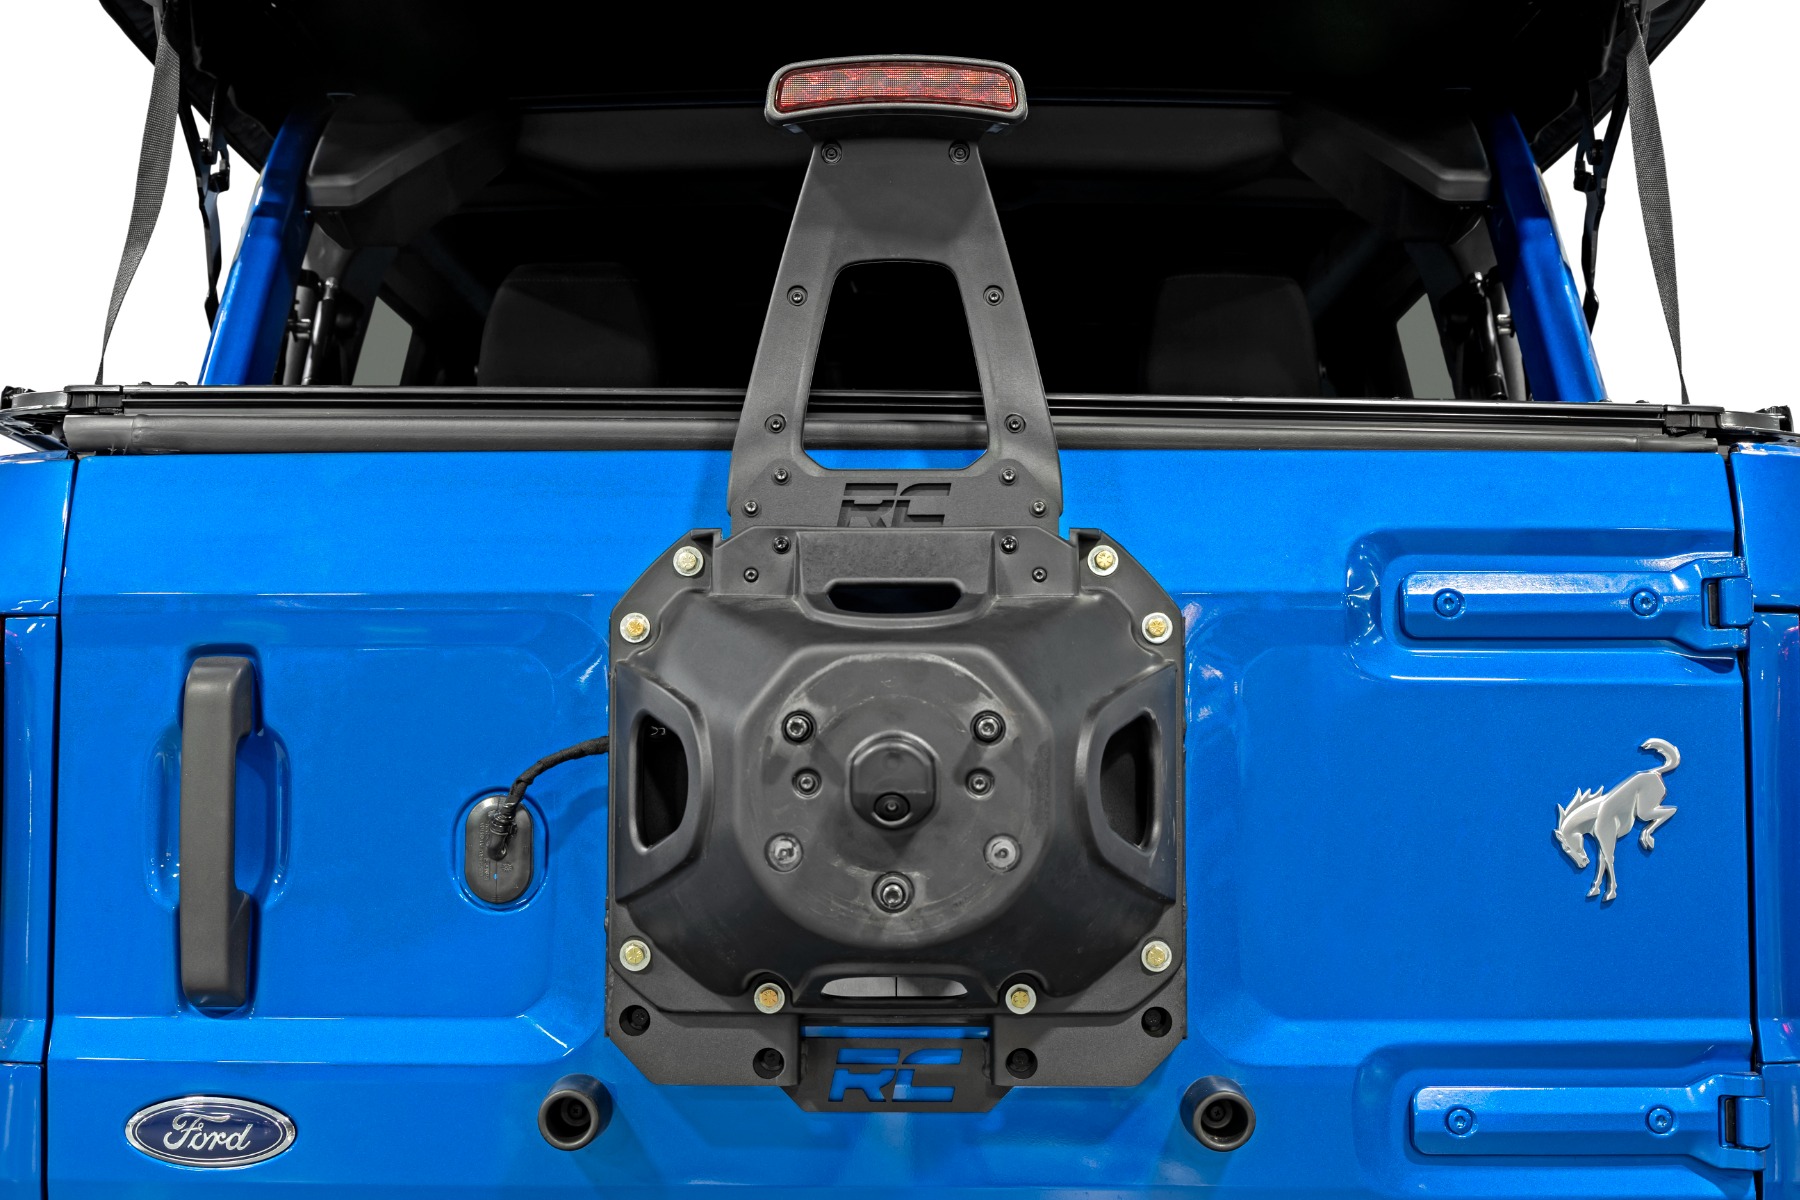
Spare Tire Relocation
Due to inadequate clearance over the factory bumper, the Ford Bronco cannot mount a 35-inch spare tire. So, we reinforced the tailgate and brought the spare tire mount up using our Tailgate Reinforcement Bracket and our Spare Tire Relocation Bracket. Now the Bronco has a spare tire mount that can handle the weight of a 35 or even a 37-inch spare. Since running a spare with a different height than your everyday tires could damage your differential by having different ratios turning at different speeds, you will want to carry a spare in the same size. We went with a nice-looking Fuel Rebel with a Nitto Ridge Grappler, which matches the rest of the wheels on the Bronco. We finished this look by installing our Third Brake Light Relocation Bracket, which brings the third brake light up to peek over that Nitto and let people know when you're stopping.

A Step Up
This base model Bronco came with a running board style step, but we stepped up the game by adding an aluminum rail system step that covers the pinch weld and allows us to dial the exact position of the stirrup for the step. The system we used is a modular one that allows you to add or remove different steps depending on your style. For example, you can choose to run just the rail, or an SR2 step with a large footprint, or the one we chose, the SRX2, which is a nice angular step that fits our build perfectly.


Front Bumper and Lights
In the front, we installed the RC Front Bumper that allowed us to add additional lighting with a 20-inch single row on the front and two pods on each side. Next, we moved the factory parking sensors and relocated them to our bumper. With this bumper install, the Bronco has a more aggressive appearance, better protection, and impressive off-road illumination. Finally, we added even more lighting to each side of the Bronco by installing LED Ditch Lights. This pod light installs at the base of your windshield that can be angled out to light up dark backroads. This allows you to safely maneuver through any off-road situation in the dark without obstructing visibility from inside the cab.


Bringing Up the Rear
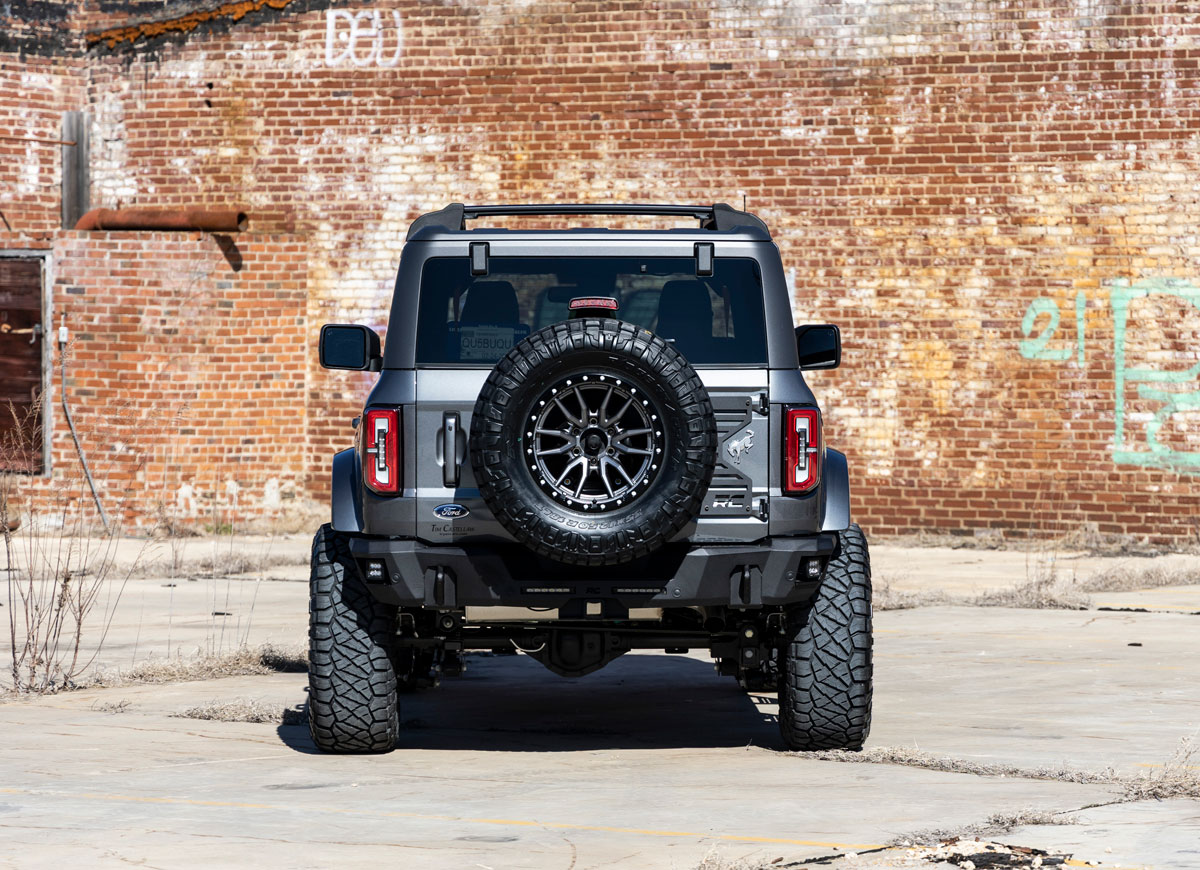
Moving on to the rear of the Bronco, we added a Rough Country Rear Bumper and our Rear Receiver Hitch. Our receiver hitch fits nicely in the recess and complements the bumper, whether you add it to the factory bumper or the RC upgrade. It's made from sturdy steel and fits standard ball receivers, so it's perfect for any job. Plus, it's designed specifically for the Bronco, so you know it'll fit like a glove. Next, we bolted in an upper tread plate on the bumper and then added another tread plate on the bottom of the step. Finally, we installed lights with our 6-inch Slimline Cree Light Bars, and 2-inch LED Cubes finishing up the rear bumper. This gives the rear of the Bronco added visibility and a unique look.


Overall, the biggest appeals of the Ford Bronco are its high performance, its top-tier off-road abilities, and its unique design. All of this is enhanced with the modifications we added. With the 3 ½ inch lift, matching front and rear bumpers with added lighting, a reinforced tailgate, and the SRX2 steps, we took the Bronco from a gelding to king of the corral.